How to change field and table labels in Report Generator
When using certain fields on Report Generator reports (e.g. user-created fields), you may see that some of the field headers show the 'technical' name rather than a user-friendly name. For instance, a header may show SERIALNUMBER instead of Learner Reference Number. This occurs when the field name has not been specified in the field properties.
The instructions below detail how to give a field a more appropriate name. Please note that you must have permissions for accessing the DB schema:
- In Maytas 5, go to Tools and click DB Schema on the General panel of the ribbon.
- Expand Tables on the left, then expand the table which contains the field you wish to change.
-
Select the field from the list. For this example we will use a user-created field: TRAINEEINFO.U_EXAMPLEFIELD
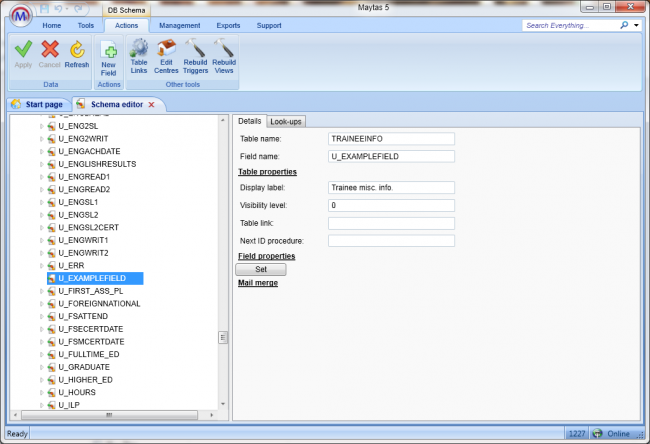
- Note that the Field Properties section on the right only has a Set button in this example. This means it currently has no field properties specified. If the field you have selected already has properties set, you will see the properties instead of the button. Click the Set button if it is present.
-
You will now see a set of field properties:
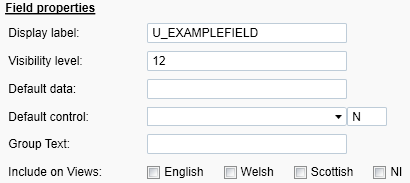
Change the Display label to the header name you wish to show in Report Generator. For this example we will call it Example Field.
If you wish to include the field on the Report Generator views, tick the relevant English, Welsh, Scottish and NI boxes.
- Click Apply.
- Go to the Home tab and click Sync.
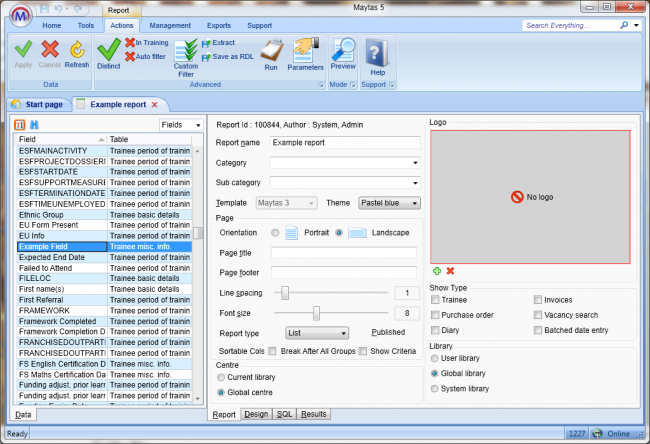
When the field is included on Report Generator reports, it will now show the new label in the header. It will also use the label in the field list in the designer.
You can also change the labels for tables by changing the Display label under the Table properties section.